WEEK 1
In the first week, we made our groups and spent most of the class time coming up with ideas. After brainstorming for a while, we came up with the idea of LED juggling balls that change color when they come in contact with the juggler's hand, and turn red and/or make a sound when dropped on the floor. Other ideas we had included the color of the balls changing according to altitude, and the color changing depending on where the juggler touches the ball. We decided to use some kind of translucent material for the balls, so that the colors can shine through it. We're still figuring out the budget required for the project.
WEEK 2
During week two, the materials to be used were decided. The list included-
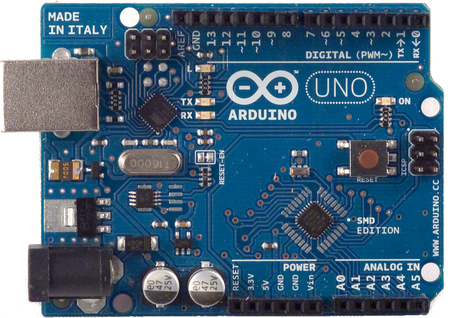
1. Arduino UNO R3 microcontroller
Link - http://www.amazon.com/Arduino-Board-ATmega328P-Microcontroller-ATmega16U2/dp/B006H06TVG/ref=sr_1_1?s=pc&ie=UTF8&qid=1428616261&sr=1-1&keywords=arduino+uno
2. Kootek Arduino GY-521 accelorometer
Link - http://www.amazon.com/Kootek-Arduino-MPU-6050-gyroscope-accelerometer/dp/B008BOPN40/ref=sr_1_1?ie=UTF8&qid=1428616475&sr=8-1&keywords=accelerometer
3. Microtivity IBI171 170-point mini breadboard
Link- http://www.amazon.com/microtivity-170-point-Breadboard-Arduino-Jumper/dp/B004RXINEG
4. RGB LED lights
Link- http://www.amazon.com/Round-Common-Cathode-Emitting-Diodes/dp/B005VMDROS
The ball to be used as the juggling ball remains undecided.
Link- http://www.amazon.com/Round-Common-Cathode-Emitting-Diodes/dp/B005VMDROS
WEEK 3
The required materials for one ball were ordered in week three in order to create a prototype ball. This included an Arduino UNO, an accelerometer and batteries. The coding for the main required process was also started. A basic layout for the approach of the code was created, in order to provide a clearer overview of the task at hand. For the prototype ball, a 4" styrofoam ball was hollowed out to fit the required components. This turned out to be too small for the Arduino. The ball was then changed to 5".
WEEK 4
During week 4, the materials required were received. The material for the ball was changed to a 5" fillable transparent christmas ornament.
The positioning of the Arduino and the other required components was decided.
The programming language was finalized as the original Arduino language. Research for the connections required for the accelerometer and other equipment was conducted to further speed along the assembly process.
WEEK 5
During week 5, most of the time was spent on working on the code. The layout for the code was decided as -
The wiring for the Arduino was also worked on. The layout for the wiring is as follows-
WEEK 6
Week 6 consisted of coding for the Arduino and actually building the ball by choosing the positioning of the Arduino and breadboard to be in opposite halves of the ball. The components of the ball would eventually be further padded to prevent damage on impact.


No comments:
Post a Comment